


Key Steps
1.
2.
3.
4.
5.
6.
Download and open the template
Find the published parameters
Edit and customise your texts
Add your own footage
Insert your logo
Produce your video
0 : 20
0 : 53
1 : 16
1 : 25
1 : 57
2 : 11
2.
3.
4.
5.
6.
Find the published parameters
Edit and customise your texts
Add your own footage
Insert your logo
Produce your video
0 : 53
1 : 16
1 : 25
1 : 57
2 : 11
Tips and Tricks
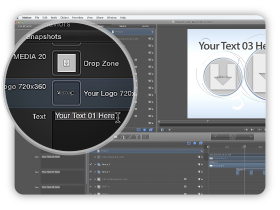
Published Parameters
Drag your footage in this panel and
edit your texts.

Current Time Indicator
Displace this locator to preview
your project without rendering it.
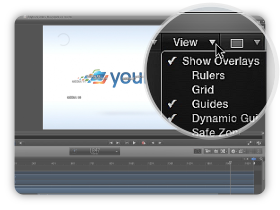
Show Overlays
Click on this button to toggle
on or off the different overlays.
Tutorial Transcript
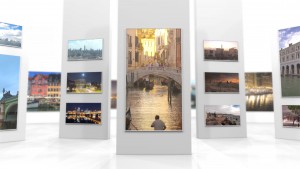
In this tutorial, I will show you how to use an Apple Motion template. I will explain how to add your footage, modify the texts and add your logo. First you have to extract all the compressed files in a folder on your computer. Then open the Apple Motion template : it is the file with the .motn extension. As you can see, when you open one of our templates, you have a quick Instruction note that first you have to turn off. You can have a quick look at the template, just click and move the current time indicator. In this example I use Stylish Orbs Revolution, you can notice that this template contains footage and texts placeholders.
First I will show you where to find the published parameters panel. You have to go into Project then click on Inspector. Now you have all the drop zones and the texts placeholders. Depending on the templates this panel can also include customisation options, such as colors or different element looks. Now you can modify some texts, it will automatically update on the preview screen.
To import your video, go into Media, add some footage and once you finished the upload, just go to the published parameters and drag your footage one by one on the different dropzones. Again it will automatically updates the template, as you can notice in the preview screen. If you are using videos, please pay attention to the length of your footage : if your duration is too short, it may show up as a still image or show up an empty placeholder.
You have to repeat the same steps to include your logo. We indicated you the dimensions so you can edit your logo with your favorite picture editor. Just specify the dimensions and then it will fit perfectly to your project.
Once you have finished to edit the template, here is how to export your video. In the Share menu, select Export movie, choose your settings. We advise you to use a H264 codec for a great quality-size ratio. The render time is pretty fast on Apple Motion compared to After Effects, but it will vary depending of the complexity of the template and the compression of your videos.
We hope this tutorial has been useful for you. If you have any questions, feel free to contact us and we will get back to you quickly. Thanks for watching!
Comments are closed.